
Best 3D Printer Under $500: 2026 US Guide

Design and making background since school. Bambu Lab owner — regularly printing projects with my kids and practical fabrications around the house. 3D printing sits right where design thinking meets problem solving.
Just so you know, some links on this page are affiliate links. If you buy something via them, we get a small kickback. You don't pay more, but it helps toward filament and test prints.
Under $500 is where 3D printing transitions from "entry-level compromise" to "genuinely capable." You leave most budget constraints behind without paying for brand prestige or premium polish. At this range, every printer on this list will produce excellent work. The question is not quality, it's what kind of maker you are and which feature set suits your projects.
Quick Picks
Prices shown are approximate at time of review. Click "Check Price on Amazon" for current pricing.
Still deciding? Take our quiz to match a specific printer to your projects and printing style.
The $500 Threshold
Under $500, you're buying a printer that handles standard materials reliably. Above $500, you're adding convenience features: enclosed chambers become standard, software does more of the thinking for you, and failure detection is built in.
The honest truth: A $200 printer in skilled hands prints as well as a $500 printer. The $500 printer requires less frustration, less time learning, and less troubleshooting. The $200 printer teaches you more about how printers actually work.
Choose based on your tolerance for calibration and your available debugging time, not on assumptions about quality.
The $200 vs $400 vs $500 Real-World Comparison
Print quality: With identical tuning, nearly identical. Skilled operators on an Ender 3 produce prints as good as machines three times the price. The difference is in consistency, a $400 printer produces good prints 95 times out of 100. The Ender 3 produces good prints 80 times out of 100, and the other 20 require debugging.
Setup time: Ender 3 requires 2–3 hours of initial setup and calibration. AnkerMake M5C requires 20 minutes. That's real.
Ongoing maintenance: Ender 3 requires weekly inspection, occasional recalibration, nozzle cleaning. Higher-end printers handle more of this automatically.
Learning curve: Ender 3 teaches you how printers work. The M5C teaches you how to use a printer. Both are valid, choose based on whether you want to learn mechanics or just make things.
Customization potential: Ender 3 has 5,000+ third-party mods. Linear rails, upgraded hotends, Klipper firmware, the upgrade path is endless. Most other printers in this range prioritize reliability over customizability.
The choice isn't "which is better", it's "which matches your personality."
Price Tiers
$150–200: The Learning Tier
Strengths: Largest community, most documentation, lowest capital risk. Problems you hit have been solved 100 times on r/3Dprinting.
Weaknesses: Requires initial calibration. Stock components are adequate but budget-grade. Small problems feel urgent because you're still learning.
Creality Ender 3 V3 SE (~$199)
The Creality Ender 3 V3 SE is the benchmark at this price. Direct drive as standard, auto bed leveling, 220×220×250mm build volume. More learning required than higher tiers, but you'll understand your printer intimately by print 100. *(Price when reviewed: ~$199 | Check Price on Amazon)*
Anycubic Kobra 2 Neo (~$159)
The Anycubic Kobra 2 Neo brings 250mm/s speeds to the absolute budget segment. Same 220×220×250mm build volume as the Ender 3, auto leveling, solid build quality for the price. Anycubic's community is smaller than Creality's, but active and helpful. *(Price when reviewed: ~$159 | Check Price on Amazon)*
$230–300: The Feature-Rich Tier
This tier introduces speed, convenience, and multi-color without losing the maker experience.
Creality K2 SE (~$249)
The Creality K2 SE is the cheapest way into multi-color 3D printing. 500mm/s speeds, die-cast aluminum frame, and the CFS (Color Filament System) holds 4 spools with automatic filament changes. Connect up to 4 CFS units for 16-color capability. Multi-color prints require more tuning than single-color, and there's some filament waste during color changes (the purge tower), but the results are impressive for the price. *(Price when reviewed: ~$249 | Check Price on Amazon)*
Sovol SV06 ACE (~$249)
The Sovol SV06 ACE runs Klipper firmware from the factory, more optimization depth than Marlin-based printers. Built-in camera for remote monitoring, all-metal hotend handles PETG and TPU from day one. Open-source design makes it the tinkerer's choice. (Price when reviewed: ~$249 | Check Price on Amazon)
Flashforge Adventurer 5M (~$279)
The Flashforge Adventurer 5M goes the opposite direction: maximum ease of use. Fully enclosed CoreXY design, 600mm/s speeds, quick-swap nozzle system, and one of the quietest printers available. The enclosure is a genuine safety advantage if you have children or pets. WiFi connectivity means no SD card shuffling. *(Price when reviewed: ~$279 | Check Price on Amazon)*
$350–500: The Reliability & Volume Tier
Printers here maximize speed, build volume, or automation.
AnkerMake M5C (~$399)
The AnkerMake M5C brings Anker's consumer electronics engineering to 3D printing. 500mm/s speeds, AI camera monitoring that detects print failures in real-time, and build quality that feels more like an appliance than a hobby kit. Solid manufacturer support. If your goal is output over education, this is the mid-range pick. *(Price when reviewed: ~$399 | Check Price on Amazon)*
Creality K1 Max (~$499)
The Creality K1 Max delivers 300×300×300mm build volume with 600mm/s speeds in an enclosed chamber. Print large functional parts, full-size cosplay props, furniture brackets, large enclosures, without splitting models across multiple print jobs. If build volume is your constraint, this is the logical jump. *(Price when reviewed: ~$499 | Check Price on Amazon)*
Understanding Your Real Needs
Before choosing, ask yourself:
Print size: What's the largest thing you'll print? If you don't know, 220×220mm (Ender 3 standard) handles most useful prints. Only jump to 300+mm if you have a specific project requiring it.
Print speed: Do you care? 100mm/s produces fine results. 500mm/s is faster but requires tuning. Fast printing is an advanced feature, not a beginner priority.
Troubleshooting appetite: Can you spend an hour on a failed print without frustration? Ender 3 route. Prefer the printer to handle it? AnkerMake route.
Material needs: Starting with PLA? Any printer works. Want ABS/ASA eventually? Get an enclosed printer now, or plan to add an enclosure later ($30–80).
What to Avoid
Printers under $150 with sketchy reviews: Below this point, quality control degrades. Creality and Anycubic are the budget floor for reliability. No-name brands have unacceptable failure rates.
**Resin printers in this tier:** Resin printers in the $200–500 range produce incredible detail, but they have higher running costs and require chemical handling. Compare true total cost of ownership before choosing. See our [FDM vs resin guide](/guides/fdm-vs-resin-printer-us).
Enclosed "budget tent" frames: Some Ender 3 users buy cheap fabric enclosures. These create more problems than they solve, uneven temperature, restricted airflow, potential fire hazard. If you need an enclosure, buy a printer with one built in.
Running Costs & Budget Reality
| Item | Cost |
|---|---|
| PLA filament | $15–25/kg |
| PETG filament | $18–28/kg |
| ABS filament | $18–28/kg |
| Nozzle replacement | $1–3 each, every 50–100 prints |
| PEI build surface | $15–25, lasts 100–200 prints |
| Electricity per print | $0.05–0.15 |
| **Monthly (casual, 2–3 prints/week)** | **$10–20 in consumables** |
No subscriptions. No recurring fees. Compared to most hobbies, 3D printing is cheap once you own the printer.
Storage & Maintenance
Most printers in this tier don't ship with filament storage. PLA absorbs moisture, degrading print quality. Invest in:
- A dry box ($10–15) with desiccant packs - Or a filament dehydrator ($30–60) if you're printing weekly - Vacuum bags for long-term storage
Stock parts to keep on hand: five spare nozzles ($5–10), PTFE tubing ($5–8) for Bowden machines, and a PEI replacement sheet ($15–25).
Common Mistakes in This Price Range
Buying based on specs instead of philosophy: Two printers both have 220×220mm build volumes. One is faster, one is more reliable. Which is "better"? Depends entirely on what you value.
Assuming higher price = higher quality: A $400 printer is not objectively better than a $200 printer. It has different strengths. The $200 printer has a larger community and more learning resources.
Underestimating the "learning tax": Budget printers require 5–10 hours of initial calibration before prints are reliably good. If you have zero patience for this, jump to the AnkerMake tier.
Not checking the community first: Check r/3Dprinting for your specific printer choice. If you see "mine died at 200 hours" from three different users, that's data. If you see "printed 1000 hours no issues," that's also data.
Making Your Choice
You want to learn: Ender 3 V3 SE at $199. Largest community, most tutorials, lowest upfront cost.
You want multi-color: Creality K2 SE at $249. Cheapest entry into automatic color changes.
You want speed and safety: Flashforge Adventurer 5M at $279. Enclosed, fast, quiet.
You want reliability: AnkerMake M5C at $399. AI monitoring, consumer-grade build quality.
You want large parts: Creality K1 Max at $499. 300mm cubed, enclosed, fast.
Printer Lifecycle & Expectations
First 20 prints: Calibration learning, nozzle clogs, bed adhesion problems, failed prints. This is not a sign the printer is broken, it's the learning phase. Every maker goes through it.
Prints 20–100: Reliability increases, you understand your printer's personality, quality stabilizes. Occasional failures become learning opportunities rather than frustrations.
Prints 100+: You've hit the printer's real limitations (if any). This is when upgrades make sense, and when you know exactly which upgrades will actually help.
Most under-$500 printers are reliable enough that "printer failure" is rare. "User mistake" is common, but fixable with experience.
Common Questions
Can a $200 printer really compete with a $500 printer? Yes, in skilled hands, print quality is nearly identical. The $500 printer produces consistent results with less effort. The $200 printer requires more calibration time but teaches you more. After 100 prints on an Ender 3, you'll produce work indistinguishable from a machine three times the price.
Should I buy from Amazon or direct from the manufacturer? Amazon offers faster shipping and easier returns. Direct from manufacturer (Creality, Prusa, Bambu Lab) sometimes offers better pricing or bundle deals. Prusa ships from their US distribution center with good delivery times and exceptional customer support.
Do I need an enclosure? For PLA: no. For ABS or ASA: yes, these materials warp aggressively without temperature control. If you want to print engineering-grade thermoplastics eventually, buy an enclosed printer now (Adventurer 5M, K1 Max) or budget $30–80 for an aftermarket enclosure later.
What about print speed, does it matter? At beginner level, not much. 100mm/s produces fine results and is within every printer's comfort zone. 500mm/s is faster but requires calibration and experience with input shaping to avoid print quality degradation. Speed becomes valuable once you're producing multiple prints daily; for casual printing, it's a marketing number, not a practical differentiator.
How long do prints take? Depends on size and settings. A phone stand: 2–4 hours. A detailed miniature: 4–8 hours. A large functional part: 12–24 hours. Higher quality (lower layer height) means longer prints. Most beginners start at 0.2mm layer height, which gives good quality at reasonable speed.
Pick based on your next 50 prints, not theoretical future needs. The best printer is the one you'll actually use. After 50 prints, you'll know exactly what you need, and that knowledge is worth more than any amount of research.
Accessories and Setup Essentials
Every new printer needs a few accessories that rarely come in the box. Budget an extra 30 to 60 dollars for these essentials during your first month.
**Filament storage:** PLA absorbs moisture from the air, degrading print quality over time. At minimum, store open spools in large ziplock bags with silica gel desiccant packets (about 8 to 12 dollars for a bulk pack). For regular printing, a dedicated filament dry box (15 to 25 dollars) keeps the active spool dry while feeding through a small exit hole. If you live in a humid climate, a filament dryer (30 to 50 dollars) pays for itself quickly by rescuing moisture-damaged spools.
Bed adhesion aids: PEI spring steel beds (standard on most modern printers) work well with PLA out of the box. For PETG, apply a thin layer of glue stick to prevent the material from bonding too aggressively to PEI (PETG can damage the surface if it adheres too strongly). Keep a bottle of isopropyl alcohol and a microfiber cloth for cleaning the bed between prints. Fingerprints and dust cause adhesion failures that look like printer problems.
Basic tools: A set of flush cutters (5 to 8 dollars) for removing supports cleanly. A small spatula or scraper for stubborn prints (most printers include one). A set of metric hex keys for maintenance (most printers include these too). A brass wire brush (3 to 5 dollars) for cleaning the nozzle exterior during filament changes.
Spare nozzles: Brass nozzles are consumable items. They wear gradually, especially with filled filaments. A pack of five standard 0.4mm nozzles costs 5 to 10 dollars and lasts most casual printers 6 to 12 months. Keep spares on hand so a worn nozzle does not halt a project.
Software You Will Need
Three free tools handle everything a beginner needs.
Slicer software: Ultimaker Cura (free) or PrusaSlicer (free) converts your 3D model files into instructions the printer reads. Both include preset profiles for most popular printers. Start with Cura if you are using a Creality printer. Start with PrusaSlicer if you are using a Prusa. Either works for any printer with minor configuration.
Model repositories: Thingiverse, Printables, and Cults3D host hundreds of thousands of free downloadable models. Functional parts, toys, miniatures, household items, tools. Most beginners print exclusively from these repositories for the first few months before learning to design their own models.
3D modeling (optional): TinkerCAD (browser-based, free) handles simple designs and modifications. Fusion 360 (free for personal use) handles everything from basic parts to complex engineering designs. Blender (free) handles organic and artistic modeling. None of these are required to start printing, but learning basic modeling within your first three months unlocks the real potential of owning a printer: making exactly what you need, designed to your exact specifications.
Firmware and Software Considerations
The firmware your printer ships with affects how much you can tune it and how future upgrades work.
Marlin (Ender 3 series, Anycubic Kobra) is the most documented open-source firmware. Every setting, calibration method, and modification has been written up and YouTubed. The downside: updating firmware requires flashing, and configuration is manual.
Klipper (Sovol SV06 ACE, some Creality variants) runs on a Raspberry Pi and communicates with the printer. Config files are plain text. Real-time tuning via the browser interface. Faster input shaping tuning without hardware tools. Higher ceiling for experienced users; more to learn upfront for beginners.
For recommendations across all price points, the best 3D printers US guide covers the full market.
Proprietary firmware (AnkerMake, Flashforge Adventurer) prioritizes ease of use over configurability. You lose upgrade depth but gain a polished, trouble-free experience. Right choice if you want output, not mechanics.
For detailed material comparisons see our [filament guide](/guides/pla-vs-petg-vs-abs-us). For extruder differences see our direct drive vs Bowden guide.
What You'll Need With It

Mid-tier PLA+ filament with enhanced toughness. Best-seller on Amazon UK with thousands of reviews. Strong, reliable, smooth results. Great value when discounted to around £13. The step-up from basic PLA.

Double-sided magnetic flexible build surface (smooth and textured PEI). Excellent adhesion for PLA, PETG, ABS, TPU without glue. Easy part removal by flexing the spring steel. Solves warping and adhesion issues.
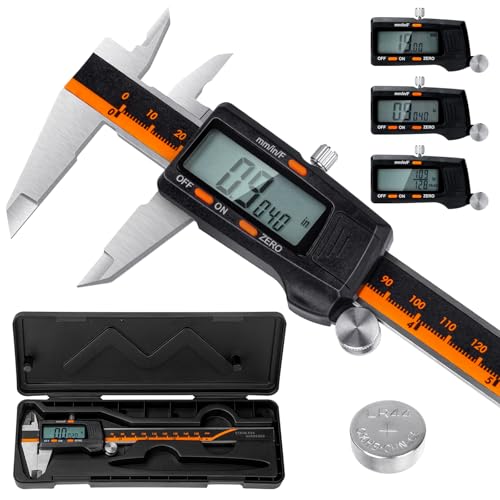
Laboratory-grade accuracy (0.01mm resolution, ±0.02mm accuracy) for measuring filament diameter, print dimensions, and calibration. Hardened stainless steel construction. Essential for proper calibration and quality control.
As an Amazon Associate, we earn from qualifying purchases.