
Creality Ender 3 Comparison: V2 vs V3 SE vs V3 KE (US Guide)

Design and making background since school. Bambu Lab owner — regularly printing projects with my kids and practical fabrications around the house. 3D printing sits right where design thinking meets problem solving.
Just so you know, some links on this page are affiliate links. If you buy something via them, we get a small kickback. You don't pay more, but it helps toward filament and test prints.
The Ender 3 family is what budget 3D printing looks like when it works properly. Creality has sold millions of these machines because they print well, the community is enormous, and every problem you will hit has already been solved and documented somewhere. The question is which variant to buy.
The Lineup Ender 3 V2: The mid-range classic (around $200) Ender 3 V3 SE: Budget king with modern features (around $199) Ender 3 V3 KE: High-speed upgrade (around $299) Ender 3 V3 Core: No compromises (around $230)
Ender 3 V2: Established Workhorse The V2 improved on the original with a silent mainboard, integrated toolbox, and cleaner design. Massive community support means solutions exist for every problem.
Pros: Proven reliability, endless documentation, huge mod ecosystem Cons: Manual bed leveling, older design, Bowden extruder Best for: Makers who want maximum community support and plan to modify
Ender 3 V3 SE: Top Pick The Creality Ender 3 V3 SE is Creality's best value proposition. Auto bed leveling (CR Touch), sprite direct drive extruder, and PC spring steel bed. Modern features at budget prices.
Pros: Auto bed leveling, direct drive, excellent value, good beginner experience Cons: Slightly smaller community than V2, standard speed Best for: New makers wanting modern features without premium prices
Ender 3 V3 KE: Speed Demon CoreXY kinematics enable 500mm/s speeds versus 180mm/s on other Ender 3 variants. Input shaping reduces quality loss at speed.
Pros: Dramatically faster printing, modern motion system, excellent quality at speed Cons: Higher price, different architecture means some V2 mods don't apply Best for: Makers prioritizing print time over cost
Ender 3 V3 Core: Balanced Choice Slots between V3 SE and V3 KE with improved motion system over SE but not full CoreXY of KE.
Pros: Better speed than SE, lower price than KE, good balance Cons: Neither the cheapest nor the fastest Best for: Makers wanting moderate speed improvement without KE complexity
Feature Comparison Auto bed leveling: V3 SE, V3 KE, V3 Core (V2 requires mod) Direct drive: V3 SE, V3 KE, V3 Core (V2 is Bowden) Print speed: KE (500mm/s) > Core > SE/V2 (180mm/s) Build volume: All similar (220x220x250mm) Price: SE < V2 < Core < KE
Which Should You Buy? Tight budget, learning focus: Ender 3 V3 SE (around $199) Maximum community support: Ender 3 V2 (around $200) Balanced modern features: Ender 3 V3 Core (around $230) Speed priority: Ender 3 V3 KE (around $299)
Upgrade Paths V2: Add auto bed leveling, upgrade to direct drive, endless mods available V3 SE: Mostly complete stock, add all-metal hotend for higher temps V3 KE: Already optimized, linear rail upgrades available
Our Recommendation Most beginners should buy the Ender 3 V3 SE. Best features-per-dollar with modern conveniences. *(Price when reviewed: ~$199 | Check Price on Amazon)* The V3 KE makes sense if print speed matters more than saving $100.
Detailed Comparison: V3 SE vs V2
These two share the same build volume and print the same materials, but the user experience is completely different.
Assembly: Both arrive mostly assembled and take about 30–60 minutes to set up. The V3 SE has fewer steps because the direct drive carriage is pre-installed. The V2 requires more manual wiring connections.
First print success rate: The V3 SE wins here. Auto bed leveling via CR Touch removes the most common first-print failure mode. New users on the V2 frequently spend hours chasing perfect manual leveling before a successful first print. The V3 SE does it automatically.
Print quality at 0.2mm: Identical in practice. Both machines produce good prints at standard settings. Layer adhesion, surface finish, and dimensional accuracy are comparable.
Community resources: The V2 has been around longer and has more tutorials, mods, and documented fixes. The V3 SE is catching up fast, and its CR Touch leveling system means you'll need fewer community fixes for the most common problems.
Verdict: For a first printer, the V3 SE is worth the identical price over the V2. You reduce frustration from day one with auto leveling. For someone who enjoys modifying hardware, the V2's richer modification ecosystem has appeal.
Detailed Comparison: V3 SE vs V3 KE
The V3 KE is a genuinely different machine, not just a faster Ender 3.
Motion system: The V3 SE uses a bed-slinger architecture (the bed moves in Y, the printhead in X and Z). The V3 KE uses CoreXY (both motors drive the printhead in X and Y simultaneously, the bed only moves in Z). CoreXY enables faster movement with less vibration because the moving mass is lower.
Speed in practice: The V3 SE prints reliably at 100–180mm/s. The V3 KE comfortably runs 300–500mm/s. A 4-hour print on the V3 SE takes about 90 minutes on the V3 KE. If you print regularly, this adds up.
Print quality at speed: The V3 KE uses input shaping (automatic vibration compensation via accelerometer calibration) to maintain quality at high speeds. The V3 SE at 180mm/s produces comparable quality to the V3 KE at 300mm/s.
When the KE is worth it: You print multiple projects per week and print time is a real constraint. You're printing for a small business or producing gifts and want throughput.
When the SE is the right call: You print occasionally. You're learning and aren't yet limited by print speed. You want to save $100.
Slicer Settings for Each Model
All four models work with the major free slicers. Here's where to start.
PrusaSlicer / OrcaSlicer (recommended for all Ender 3 models): - Creality maintains official printer profiles for the V3 SE, V3 KE, and V2 - Layer height: 0.2mm for general printing, 0.12mm for detail, 0.28mm for fast/functional - First layer height: 0.3mm (gives extra squish for adhesion)
Creality Print (official, free): - Pre-configured for Creality machines, easier for beginners - Less community knowledge than PrusaSlicer
Speed settings by model: - V2: 40–60mm/s print, 90mm/s travel - V3 SE: 60–150mm/s print, 180mm/s travel - V3 Core: 100–200mm/s print, 200mm/s travel - V3 KE: 200–500mm/s print, 500mm/s travel
Maintenance Schedule
All Ender 3 models are low-maintenance, but regular upkeep keeps them printing reliably.
Monthly (or every 5–10 spools): - Clean the PEI bed with isopropyl alcohol - Check belt tension, X and Y belts should feel taut like a guitar string - Inspect the nozzle exterior for burnt residue and clean with a brass wire brush
Every 3–6 months: - Lubricate the lead screw (Z-axis) with PTFE-compatible grease - Lubricate the linear rods with light machine oil or PTFE spray - Check all eccentric nuts, V-slot rollers should roll without wobble
When to replace the nozzle: - Brass nozzles last roughly 200–500 hours with standard PLA/PETG - Replace when stringing increases despite good retraction settings - Switch to hardened steel nozzle for carbon-fiber reinforced or metal-fill filaments
Bed care: - PEI spring steel: flip to the reverse side when adhesion degrades. Clean with IPA before PETG prints, PETG bonds aggressively to PEI and can damage the surface. A thin layer of glue stick prevents permanent adhesion.
Common Problems and Fixes
| Problem | Likely Cause | Fix |
|---|---|---|
| First layer not sticking | Z-offset too high or dirty bed | Lower Z-offset by 0.05mm, clean bed with IPA |
| Prints warping at corners | Bed temp too low or drafts | Raise bed to 60°C for PLA, block nearby air vents |
| Layer shifting (print looks sheared) | Loose belt | Tighten X or Y belt until taut |
| Grinding noise from extruder | Clog or over-tight spring | Check for partial nozzle clog, reduce extruder tension |
| Stringing between parts | Retraction not set or temp too high | Enable retraction (1–2mm direct drive), drop temp 5°C |
| Z-banding (horizontal lines) | Lead screw needs lubrication | Clean and re-lubricate lead screw |
| Elephant's foot (base too wide) | First layer squished too hard | Raise Z-offset slightly |
What to Print First
Calibration objects: - The Benchy, standard first print for every maker. Tests overhangs, bridging, details, and cooling simultaneously. - Calibration cube (20×20×20mm), verify dimensional accuracy on all three axes - Temperature tower, find your filament's optimal print temperature
Useful prints for your printer: - Cable clips and cable chains for the frame - Filament guide and tube clip (V2 Bowden) - Spool holder upgrades - Modular parts tray
Find all of these free on Printables and Thingiverse. Search the model name plus "Ender 3" and the community version will be there.
Buying in the US
All four Ender 3 variants are available on Amazon. Creality also sells direct through their website and on Amazon as an official seller. Amazon is the most convenient option for most buyers, with easy returns if the printer arrives damaged.
Current US pricing (approximate): - Ender 3 V2: ~$200 - Ender 3 V3 SE: ~$199 - Ender 3 V3 Core: ~$230 - Ender 3 V3 KE: ~$299
Prices fluctuate and the V3 SE frequently goes on sale. Check the Amazon listing for current pricing before buying.
Buy the V3 SE. Set it up, print the Benchy, calibrate your first layer. By the time you finish your first spool you will know exactly what it can do, and you will understand why this family of printers built the largest 3D printing community in the world.
Upgrade Compatibility Between Models
One of the Ender 3 family's strengths is that most aftermarket upgrades are shared across variants, though with some exceptions.
Universal upgrades (compatible with all Ender 3 variants): - GT2 belt replacements, same spec across the family - POM V-slot wheels, same specification - Hotend sock, same size - 0.4mm nozzles, same thread for standard hotend versions - Platform springs, same mounting points
Variant-specific considerations: - The V3 SE and KE use Creality's Sprite extruder design; upgrade accessories for the original Ender 3 hotend don't apply - The Ender 3 S1 series uses a different X carriage than the V2; linear rail upgrades are not cross-compatible - CR Touch/BLTouch mounting brackets are model-specific, check your gantry profile before ordering
Community resources for the Ender 3 family: The r/ender3 subreddit and r/3Dprinting have the most active troubleshooting communities for the Ender 3 line. The Ender 3 wiki on Reddit is the best structured first-stop reference. Printables has thousands of Ender 3 specific STL files for upgrades, cable guides, fan duct improvements, tool holders, and more.
The Upgrade vs. Buy New Decision
The Ender 3 landscape has shifted. The V3 SE costs around $180-200 and ships with features that would cost $80-100 to add to an older Ender 3 (CR Touch, direct drive, PEI spring steel bed, silent board). This changes the upgrade economics significantly.
When upgrading an existing Ender 3 makes sense: - Your printer is mechanically sound and you're troubleshooting one specific issue - The total upgrade cost is below $80-100 - You enjoy the process of tuning and learning - You have a specific reason the new model doesn't address
When buying the V3 SE makes more sense: - You're adding three or more separate upgrades to an old machine - Your current printer has mechanical wear alongside the issues you're trying to fix - You want a reliable machine without the setup time
The V3 SE does not replace the original Ender 3 in one important way: the modding community is less mature for the newer model. An Ender 3 Pro/V2 has years of community modifications, firmware improvements, and tested upgrade paths. For hobbyists who enjoy tinkering, the older machines remain attractive even at lower spec.
Slicer Settings Differences Between Models
Your Ender 3 variant needs a specific printer profile in your slicer. Using the wrong profile causes print issues that are difficult to diagnose.
Key differences that need correct profiles: - Direct drive vs Bowden: The V3 SE and S1 use direct drive; original Ender 3 and V2 use Bowden. Very different retraction settings (direct: 0.5-1.5mm; Bowden: 4-6mm) - ABL probe offset: If you've added a CR Touch to an older model, configure the probe X/Y offset in firmware and slicer
PrusaSlicer and OrcaSlicer both include Ender 3 profiles. Select the exact model from the machine library during setup.
Community Resources and Where to Get Help
r/ender3 (Reddit): The primary community. Post photos of your print failures and the community will usually identify the cause. Check the wiki for common issues before posting.
Printables.com: Filter by "Ender 3" for thousands of tested upgrade designs. Most popular upgrades have multiple versions with community feedback.
Teaching Tech on YouTube: Comprehensive calibration guides specifically for Creality printers, including the full calibration workflow from e-steps through temperature towers and retraction.
Creality support portal: For warranty issues and firmware downloads specific to your model. Useful for warranty claims.
Resale Value and the Second-Hand Market
The Ender 3 family has one of the strongest second-hand markets of any consumer 3D printer. A well-maintained Ender 3 Pro or V2 with upgrades (PEI bed, silent board, direct drive) holds value well because the upgrade ecosystem makes even older machines capable.
When buying second-hand: look for photos of actual prints, ask about upgrade history, and check that the machine comes with a working power supply. Budget for a bed cleaning and Z-offset recalibration before your first print.
When selling: list the specific upgrades installed, include spare parts you no longer need, and provide photos of calibration prints. A thoughtfully upgraded and documented Ender 3 commands a significant premium over stock.
The used Ender 3 market on Facebook Marketplace, Craigslist, and eBay is active enough that you can usually find machines locally, which avoids shipping costs on a heavy, fragile item.
Firmware: Stock vs Custom
Stock Creality firmware works well for most users and receives periodic updates. Custom firmware options exist for users who want more control.
Jyers firmware: A popular Marlin fork for the Ender 3 V2 that adds a better UI, additional calibration tools, and quality-of-life improvements over stock. Drop-in compatible with the stock hardware.
Klipper: The full firmware replacement described in the upgrade section. Most relevant for the original Ender 3 boards and users running direct drive upgrades who want input shaping.
What to Avoid
Starting with PETG or ABS before you have consistent PLA results. Each new material introduces new calibration variables. Get a hundred hours of PLA prints first. By then you'll know exactly what problem PETG solves.
Carbon fiber composites before you own a hardened steel nozzle. CF-PLA and CF-PETG destroy brass nozzles within hours. Buy the nozzle first.
Unknown no-brand filament from Amazon warehouse listings. Budget brands (eSun, Sunlu, Overture) are fine and consistent. Unknown brand filament from unverified marketplace sellers is not. Inconsistent diameter causes inconsistent extrusion, and you'll spend an hour diagnosing your printer before realizing the filament is the problem.
ABS without an enclosure. It warps. Every time. If you think you need ABS, you almost certainly need PETG or ASA instead.
What I'd Buy Today
For learning: Amazon Basics PLA at around $19/kg. Print a hundred hours of this, dial in your settings, make things you're proud of. When you need a part to survive real use, move to PETG.
For functional parts: [OVERTURE PETG](https://www.amazon.com/dp/B07PGYHYV8?tag=3dprinteradvice-20&ascsubtag=pla-vs-petg-vs-abs-us) at around $14/kg. Stronger than PLA, handles heat, works outdoors. No enclosure required. The natural step up that most makers take within the first three to six months.
For most users, stock firmware on the V3 SE or V2 is the right choice. Custom firmware is a project for users who enjoy tinkering with the software stack as much as the hardware.
What You'll Need With It

Double-sided magnetic flexible build surface (smooth and textured PEI). Excellent adhesion for PLA, PETG, ABS, TPU without glue. Easy part removal by flexing the spring steel. Solves warping and adhesion issues.

The gold standard auto-leveling sensor. Creates mesh map of bed surface to compensate for imperfections. Eliminates frustrating manual bed leveling. Essential time-saver for beginners. Includes 1M extension cable.
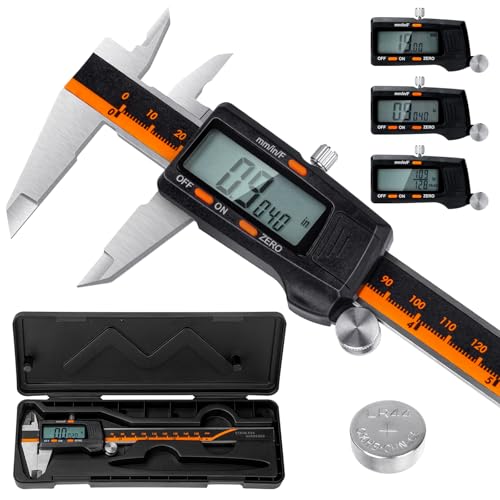
Laboratory-grade accuracy (0.01mm resolution, ±0.02mm accuracy) for measuring filament diameter, print dimensions, and calibration. Hardened stainless steel construction. Essential for proper calibration and quality control.
As an Amazon Associate, we earn from qualifying purchases.