
Best 3D Printer for Beginners UK 2026

Design and making background since school. Bambu Lab owner — regularly printing projects with my kids and practical fabrications around the house. 3D printing sits right where design thinking meets problem solving.
Just so you know, some links on this page are affiliate links. If you buy something via them, we get a small kickback. You don't pay more, but it helps toward filament and test prints.
Your first 3D printer will teach you more than any guide can. Quick answer: the Creality Ender 3 V3 SE if you want to learn how printers work, or the Bambu Lab A1 Mini if you just want good prints with less hassle. But there are six solid options now, including multi-colour printing under £250, so let's cover them all.
Quick Picks
| Printer | Build Volume | Best For | |
|---|---|---|---|
| Creality Ender 3 V3 SE | 220x220x250mm | Learning how printers work | Check Price on Amazon |
| Bambu Lab A1 Mini | 180x180x180mm | Easy prints, minimal setup | Check Bambu Lab UK |
| Anycubic Kobra 2 Neo | 220x220x250mm | Tightest budget | Check Price on Amazon |
| Flashforge Adventurer 5M | 220x220x220mm | Fast printing, enclosed | Check Price on Amazon |
| Sovol SV06 ACE | 220x220x250mm | All-rounder with auto features | Check Price on Amazon |
| Creality K2 SE | 220x215x245mm | Multi-colour capable | Check Price on Amazon |
Prices shown are approximate at time of review. Click "Check Price on Amazon" for current pricing.
Full Comparison
| Feature | Ender 3 V3 SE | A1 Mini | Kobra 2 Neo | Adventurer 5M | SV06 ACE | K2 SE |
|---|---|---|---|---|---|---|
| **Build Volume** | 220x220x250 | 180x180x180 | 220x220x250 | 220x220x220 | 220x220x250 | 220x215x245 |
| **Max Speed** | 250mm/s | 500mm/s | 250mm/s | 600mm/s | 300mm/s | 500mm/s |
| **Auto Levelling** | Yes | Yes | Yes | Yes | Yes | Yes |
| **Enclosed** | No | No | No | Yes | No | No |
| **Multi-Colour** | No | Optional AMS | No | No | No | Yes (CFS) |
| **Setup Time** | 1-2 hours | 15 min | 30 min | 15 min | 1 hour | 10 min |
| **Noise Level** | Moderate | Low | Moderate | Low | Moderate | Low |
| **Community** | Massive | Growing | Large | Medium | Medium | Growing |
| **Best For** | Learning | Easy prints | Budget | Speed + safety | Versatility | Multi-colour |
Be Honest With Yourself
Expect your first week to involve failed prints, calibration frustration, and YouTube tutorials at midnight. This is normal. Every maker on r/3Dprinting went through it. By week three, you'll wonder what the fuss was about.
So which type are you: someone who wants to understand the machine, or someone who wants to skip straight to making stuff?
Best for Learning: Creality Ender 3 V3 SE
The Creality Ender 3 V3 SE is the most recommended beginner printer for a reason. *(Check Price on Amazon)* Auto bed levelling removes the biggest beginner frustration. The sprite direct drive extruder handles various filaments. And millions of people own Ender 3 variants, so every problem has a documented solution on YouTube or Reddit.
Assembly takes 1-2 hours. You'll learn where every belt and bolt goes. That knowledge pays off when something needs adjusting later, and it teaches you transferable skills that apply to any printer you upgrade to.
Why it wins for learners: When something goes wrong (and it will), you'll understand what each part does and how to fix it. The Ender 3 community is the largest in 3D printing. Any error message, weird artefact, or failed print has been solved by someone and documented on YouTube, Reddit, or the Creality forums.
Best for Easy Prints: Bambu Lab A1 Mini
The A1 Mini is what happens when engineers optimise for beginners. Auto-calibration, polished software (Bambu Studio), and reliable results from day one. For a little more than the Ender 3, you skip a lot of the learning curve.
The trade-off? Smaller community, fewer modification options, and more proprietary parts. You're buying into an ecosystem rather than learning a transferable skill. If you ever want to tinker, you'll wish you'd started with the Ender.
Print speeds up to 500mm/s make it faster than the Ender 3. The build volume (180x180x180mm) is smaller, which limits what you can print in one piece. For most beginner projects (phone stands, organisers, decorative prints) this is plenty.
The A1 Mini Combo adds the AMS Lite multi-colour system, which lets you print in up to 4 colours automatically. Impressive for the price, but save that upgrade until you're comfortable with single-colour printing.
Best Budget: Anycubic Kobra 2 Neo
If the Ender is still more than you want to spend, the Anycubic Kobra 2 Neo gets you into 3D printing for under £150. (Check Price on Amazon)
Same 220x220x250mm build volume as the Ender 3, auto bed levelling, and 250mm/s print speeds. The build quality is solid for the price. Anycubic's community isn't as large as Creality's, but it's active and helpful.
The main compromise at this price is the extruder and hotend. They're functional but not as refined as the Ender 3's direct drive setup. You'll get good PLA prints, but you may hit limitations earlier if you move to trickier filaments like PETG or TPU.
For a first printer to test whether you enjoy the hobby, that price is hard to argue with.
Best for Speed: Flashforge Adventurer 5M
The Flashforge Adventurer 5M is the fastest printer in this price range at 600mm/s. The CoreXY design is more stable at high speeds, and the fully enclosed build chamber means better results with temperature-sensitive filaments. *(Check Price on Amazon)*
The enclosure is a genuine advantage for beginners. It keeps dust out, maintains stable temperatures, and adds a layer of safety (no exposed hot parts). If you have children or pets near the printer, the enclosed design is worth the premium alone.
Setup takes about 15 minutes. The CoreXY mechanism is factory-calibrated, so you're printing quickly. WiFi connectivity lets you send prints from your computer without moving an SD card back and forth.
It's the most expensive option in this guide, but the speed, enclosure, and ease of use make it worth considering if your budget stretches.
Best All-Rounder: Sovol SV06 ACE
The Sovol SV06 ACE sits between the Ender 3 and the premium options. Auto bed levelling, direct drive extruder, PEI spring steel build plate (prints pop right off when cool), and 300mm/s speeds. (Check Price on Amazon)
The SV06 ACE's all-metal hotend comes standard, which means you can print PETG and TPU from day one without upgrading anything. On the Ender 3, that's a modification you'd need to make later.
Sovol's firmware is based on Klipper, which gives you more control over print settings than Marlin-based printers. This is a double-edged sword for beginners: more options means more to learn, but also more to optimise once you're ready.
Best for Multi-Colour: Creality K2 SE
The Creality K2 SE is the cheapest way into multi-colour 3D printing right now. *(Check Price on Amazon)* The CFS (Colour Filament System) holds 4 spools and handles automatic filament changes mid-print. Connect up to 4 CFS units for 16-colour prints.
The die-cast aluminium frame is noticeably rigid. At 500mm/s with 20,000mm/s² acceleration, it prints fast without the wobble you get from cheaper frames. The direct drive extruder has a quick-swap nozzle and automatic filament cutter for clean colour transitions.
Multi-colour does add complexity. Colour changes waste a small amount of filament (the purge tower), and prints take longer than single-colour equivalents. But the results are genuinely impressive for the price. Dual-tone name plates, colour-coded organiser labels, multi-coloured vases, things that would need painting or multiple print jobs on other printers just work.
The CFS unit is sold separately (the combo bundle includes it). If you start with the standalone printer, you can add CFS later when you're ready. That makes it a sensible first printer even if you don't plan to use multi-colour straight away.
For more on how multi-colour 3D printing works and whether it's right for you, see my multi-colour 3D printing guide.
Total Cost of Getting Started
The printer price isn't the whole picture. Beyond the printer itself, here's what you'll spend on essentials in your first month:
| Item | Ender 3 V3 SE | A1 Mini | Kobra 2 Neo | Adventurer 5M | SV06 ACE | K2 SE |
|---|---|---|---|---|---|---|
| PLA filament (1kg) | £18 | £18 | £18 | £18 | £18 | £18 |
| Tools (cutters, scraper) | £10 | £10 | £10 | £0 (included) | £10 | £0 (included) |
| IPA + cloth | £5 | £5 | £5 | £5 | £5 | £5 |
| Spare SD card | £7 | £7 | £7 | £0 (WiFi) | £7 | £0 (WiFi) |
| **Monthly running cost** | **£15-20** | **£15-20** | **£15-20** | **£15-20** | **£15-20** | **£15-25** |
Running costs are mostly filament. One kg of PLA prints roughly 100-150 small objects or 10-20 larger ones. Most hobbyists use 1-2kg per month. Electricity adds about £2-3/month at typical UK rates.
No subscriptions. No recurring fees. No consumables that cost a fortune. Compared to most hobbies, 3D printing is cheap once you own the printer.
Your First Month Timeline
| Week | What Happens | What You'll Learn |
|---|---|---|
| 1 | Assembly, first successful print, first failed print | How the printer moves, what bed levelling does |
| 2 | Experimenting with settings, downloading from Thingiverse | How layer height and speed affect quality |
| 3 | Understanding why prints fail, starting to dial in quality | Temperature tuning, adhesion tricks |
| 4 | Making prints you're actually proud of | Slicer confidence, custom supports |
What You'll Need Besides the Printer
The printer itself isn't everything. Budget an extra £30-50 for essentials:
| Item | Cost | Why |
|---|---|---|
| **PLA filament (1kg)** | £15-20 | Your first material. Most printers include a small sample roll |
| **Scraper/spatula** | £3-5 | Removing prints from the build plate |
| **Flush cutters** | £5-8 | Trimming supports and strings |
| **IPA (isopropyl alcohol)** | £5 | Cleaning the build plate for better adhesion |
| **MicroSD card** | £5-8 | Most printers include one, but they're unreliable. Buy a branded one |
You do NOT need to buy: an enclosure (for PLA), a drying box (initially), upgraded nozzles, or any other accessories. Start printing first. Upgrade later based on real problems, not YouTube recommendations.
Slicer Software (Free)
The slicer converts your 3D model into instructions the printer understands. Two main options:
Cura: Free, works with every printer. Most YouTube tutorials reference Cura settings. The default beginner profiles work well enough to start. Huge community with shared profiles for specific printers.
Bambu Studio: Free, optimised for Bambu Lab printers but works with others. Cleaner interface than Cura. If you buy a Bambu printer, use this.
PrusaSlicer: Free, open source. More advanced features than Cura, slightly steeper learning curve. Great once you know what you're doing.
Start with Cura unless you buy a Bambu printer. The default profile for your specific printer will get you 80% of the way to good prints.
Materials to Start With
**PLA only.** It prints at low temperatures (190-220°C), doesn't warp, doesn't smell much, and forgives mistakes. Available everywhere from £15-20 per kg. eSun, Sunlu, and Amazon Basics PLA all work well.
Once you're comfortable (month 2-3), my [PLA vs PETG vs ABS comparison](/guides/pla-vs-petg-vs-abs) explains when to branch out. PETG is stronger and heat-resistant. ABS needs ventilation and an enclosure. TPU is flexible. Start with PLA.
Where to Find Things to Print
You don't need to design your own models to start. Thousands of free designs are available:
- Thingiverse: Largest free library, search anything - Printables: Prusa's library, higher quality curation - MyMiniFactory: Tested designs, mix of free and paid - Thangs: Search engine across multiple sites
Start with a Benchy (the 3D printing benchmark boat). Every beginner prints one. It tests overhangs, bridges, small details, and cooling. Compare your Benchy to the reference photos online to diagnose print quality issues.
Common First Problems (and Quick Fixes)
| Problem | Likely Cause | Fix |
|---|---|---|
| **Print won't stick to bed** | Bed not clean or not level | Clean with IPA, re-level, adjust Z-offset closer |
| **Spaghetti print** (stringy mess) | Print detached mid-way | Better bed adhesion, add a brim in slicer |
| **Stringing** (thin hairs between parts) | Retraction too low, temp too high | Enable retraction, lower temp by 5°C |
| **Layer shifting** (layers offset sideways) | Belt loose or speed too fast | Tighten belts, reduce print speed |
| **Warping** (corners lift up) | Bed too cold or drafts | Increase bed temp, eliminate drafts |
| **Under-extrusion** (gaps in layers) | Nozzle partially clogged | Cold pull cleaning, check filament path |
For deeper troubleshooting, my bed levelling guide and setup guide cover the most common issues step by step.
What to Print First (In Order)
Tempting to jump straight into a massive project. Don't. Build skills gradually:
1. Benchy, the universal 3D printing test boat. Takes 1-2 hours. Compare yours to reference photos to spot issues with overhangs, bridging, and surface quality. Every maker prints one. 2. Calibration cube, a 20mm cube that reveals dimensional accuracy. If it measures 20.0mm on all sides, your printer is dialled in. If not, adjust steps/mm in firmware. 3. Phone stand or cable clip, your first functional print. Something you'll actually use. The satisfaction of solving a real problem with something you made is what hooks most people. 4. Replacement part, a broken drawer handle, a missing shelf bracket, a custom hook. This is where 3D printing pays for itself. Measure with calipers, model in TinkerCAD (free), print. 5. A gift, a personalised keyring, a lithophane from a photo, a name plate. Showing someone what you made with your printer is what makes the hobby stick.
Your First Upgrade (Don't Rush)
Don't buy upgrades yet. Most "necessary upgrades" solve problems caused by poor calibration, not equipment limitations. After 2-3 months, consider:
1. All-metal hotend: Lets you print PETG and TPU (if your printer doesn't already have one) 2. PEI spring steel bed: Prints release easily when cool, no more scraping 3. **Better filament:** eSun PLA+ or Polymaker PolyTerra are a clear step up from Amazon Basics 4. LED light bar: So you can actually see what's printing
See my upgrade guide for what's actually worth the money and in what order.
FDM vs Resin: Which Type of Printer?
Everything above covers FDM printers (the ones using filament spools). Resin printers are a different technology:
| FDM (Filament) | Resin | |
|---|---|---|
| **Best for** | Functional parts, prototypes, large prints | Miniatures, jewellery, high-detail models |
| **Material cost** | £15-20/kg (PLA) | £25-40/litre (resin) |
| **Mess factor** | Low, some strings and dust | High: liquid resin, gloves, washing, curing |
| **Ventilation** | Not needed for PLA | Required, resin fumes are toxic |
| **Beginner-friendly** | Yes | Moderate, more cleanup involved |
Start with FDM. Resin printing produces incredible detail, but the workflow involves handling toxic chemicals, washing parts in IPA, and UV curing. My [FDM vs resin guide](/guides/fdm-vs-resin-printer) covers the full comparison.
What to Avoid
Three traps catch beginners every year:
The cheapest printer on Amazon. Below £120, printers cut corners on the hotend, frame, and quality control. You'll spend more time fixing the machine than printing with it. The Anycubic Kobra 2 Neo is the cheapest printer I'd recommend to anyone.
The "features I might need someday" trap. Don't buy an enclosed multi-material printer because you might print ABS in six months. Start with a simple PLA-capable machine, learn the basics, and upgrade when you hit a genuine limitation. Most hobbyists never need ABS at all.
Discontinued models still on sale. The original Ender 3 and Ender 3 Pro still appear on Amazon UK. These lack auto bed levelling and no longer receive firmware updates. The V3 SE replaced them. If the listing doesn't say "V3" somewhere, skip it.
Printers with no community. Before buying, search the printer name on Reddit. If there's no active subreddit or forum, troubleshooting will be a nightmare. Every printer has problems. Community support is what makes those problems solvable.
Getting Help When You're Stuck
Every beginner hits a wall somewhere in the first month. Knowing where to get help matters as much as knowing how to calibrate.
Reddit: r/3Dprinting (general), r/ender3 (Creality), r/BambuLab (Bambu). Post a photo of your failed print with your settings and someone will diagnose it within hours. The communities are genuinely helpful to new users.
YouTube: Teaching Tech's calibration guide is the single most useful beginner resource. Covers everything from e-steps to retraction tuning with printable test models. Bookmark it.
Manufacturer support: Prusa responds within 24 hours and will walk you through fixes. Creality takes 48-72 hours but their community fills the gap. Bambu's Discord is active and responsive. Anycubic has email support in English.
Warranty: All printers listed here come with at least one year of warranty. If your printer arrives damaged or develops a fault, you're covered under UK consumer rights. Keep the box for 30 days in case you need to return it.
The honest truth about troubleshooting: Most problems have a five-minute fix once you know what to look for. A failed first layer is almost always a dirty bed or wrong Z-offset. Stringing is almost always too-high temperature. Layer shifting is almost always a loose belt. These sound intimidating written down, but each fix takes less time than making a cup of tea. By week three, you'll diagnose problems by the sound the printer makes before you even look at the print.
The Real Advice
What to Avoid
The cheapest no-name printers: Below the Creality/Anycubic floor, quality control is unpredictable. Nozzle clogs out of the box, inconsistent beds, and zero community support make cheap printers genuinely more frustrating to learn on than slightly more expensive ones.
**Resin as a first printer:** Resin printers produce incredible detail, but they require chemical handling, dedicated ventilation, and a post-processing workflow that adds 20–30 minutes to every single print. Learn 3D printing on FDM first. Add resin later if you specifically need what it delivers.
Buying a printer without checking r/3Dprinting first: Every mainstream printer has documented failure modes. A 5-minute search reveals whether "mine broke at 200 hours" is common or an outlier. Know what you're buying.
Upgrading before learning: Most upgrade purchases in the first 3 months solve problems that better calibration would have fixed for free. Print 50–100 pieces before spending money on hardware changes. The exception: a PEI spring steel bed is genuinely worth fitting early if your printer doesn't include one.
Buy the printer, print something, fail, troubleshoot, succeed. Repeat. Your terrible first Benchy is more valuable than any amount of research. My setup guide walks you through assembly to first print, and my first print guide covers what to expect. Ready to look at the full range? My [best 3D printer UK guide](/guides/best-3d-printer-uk) covers every budget.
The first print that actually works, the first time you solve a problem yourself, the first time someone asks "you made that?" and you say yes. That's the moment the hobby takes hold. It happens sooner than you think, and everything after that is just getting better at it.
What You'll Need With It

Mid-tier PLA+ filament with enhanced toughness. Best-seller on Amazon UK with thousands of reviews. Strong, reliable, smooth results. Great value when discounted to around £13. The step-up from basic PLA.

Double-sided magnetic flexible build surface (smooth and textured PEI). Excellent adhesion for PLA, PETG, ABS, TPU without glue. Easy part removal by flexing the spring steel. Solves warping and adhesion issues.
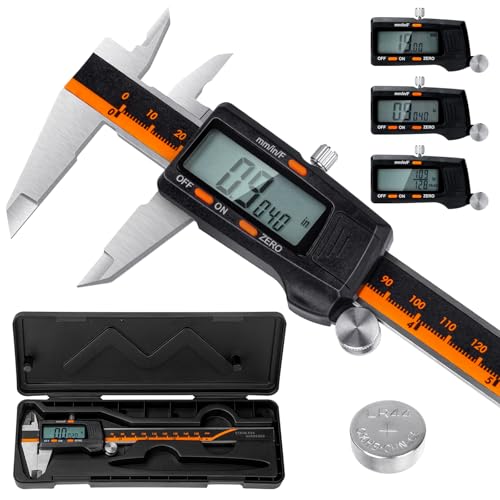
Laboratory-grade accuracy (0.01mm resolution, ±0.02mm accuracy) for measuring filament diameter, print dimensions, and calibration. Hardened stainless steel construction. Essential for proper calibration and quality control.
As an Amazon Associate, we earn from qualifying purchases.